Stripe Payment Gateway Setup
In this section we will discuss step by step process for integrating Stripe payment gateway in Blink.
Collect Stripe Connection Keys
-
Create a Stripe account at https://dashboard.stripe.com/register
-
The it will redirect you to dashboard: https://dashboard.stripe.com/test/dashboard
-
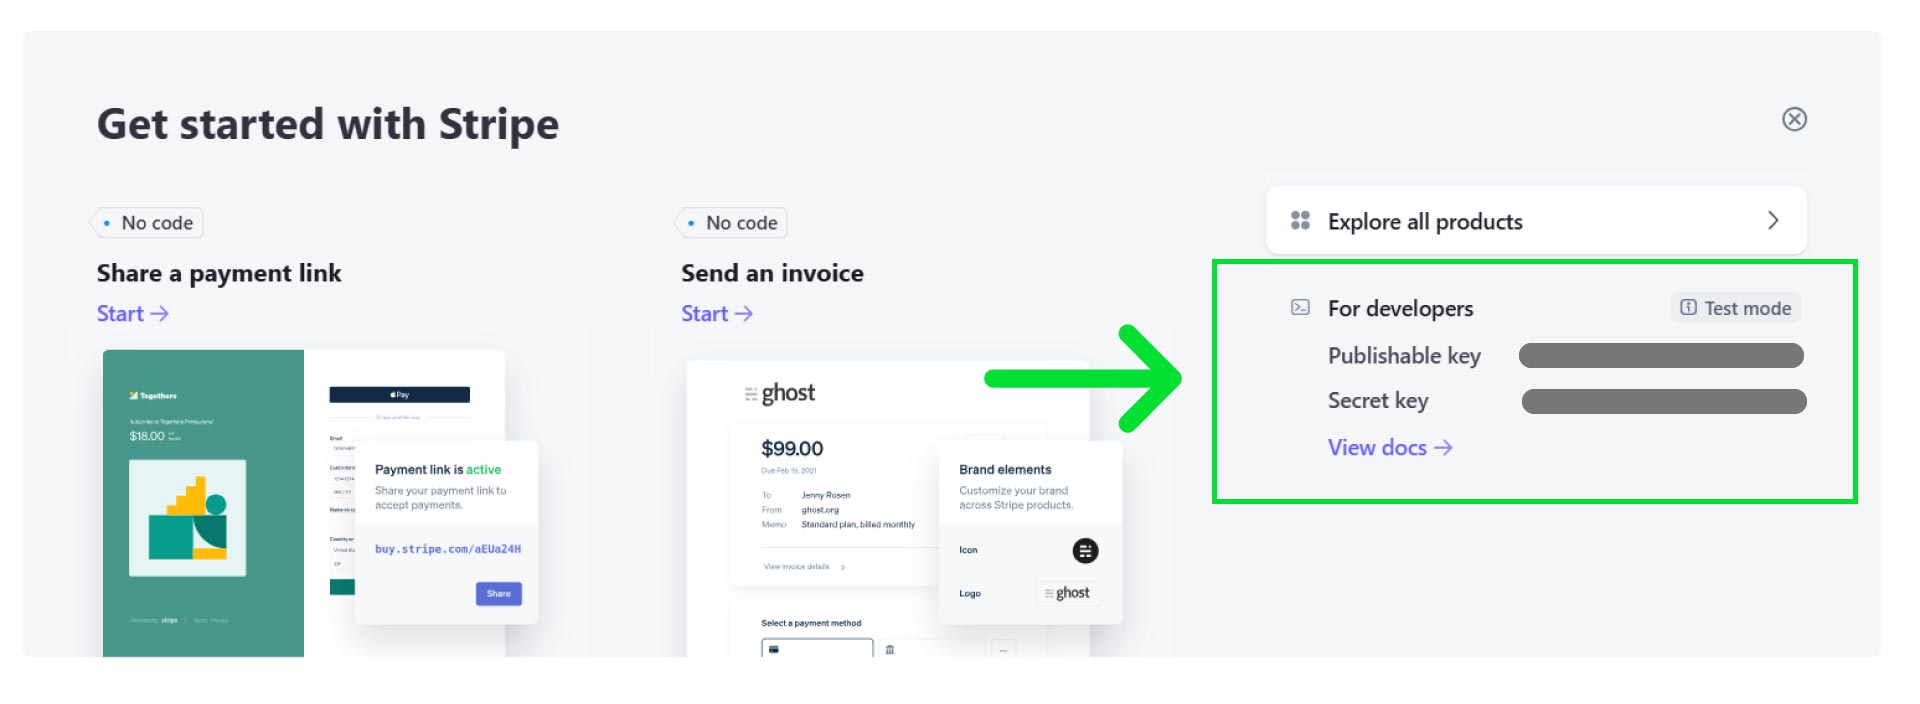
From the dashboard copy
Publishable keyandSecret key. Then save them in a secure place.

- Open the backend code in VS code and go to
.envfile, then place your secret key inSTRIPE_SECRET_KEYvariable and save it.
.env
# Stripe
STRIPE_SECRET_KEY="****************************************************************"
caution
By default Stripe comes with Test mode. You can use test mode to locally test stripe payments. To accept real money payments, follow stripe business onboarding process.
Create Product on Stripe
- From dashboard go to Product catalog.
- Press on Create a product button.
info
We have 2 paid product for subscription. There names are
- Pro
- Premium
Monthly price for Pro subscription is $3.99 and yearly rate is $39.00.
Monthly price for Premium subscription is $7.99 and yearly rate is $79.00.
You can price as you want.

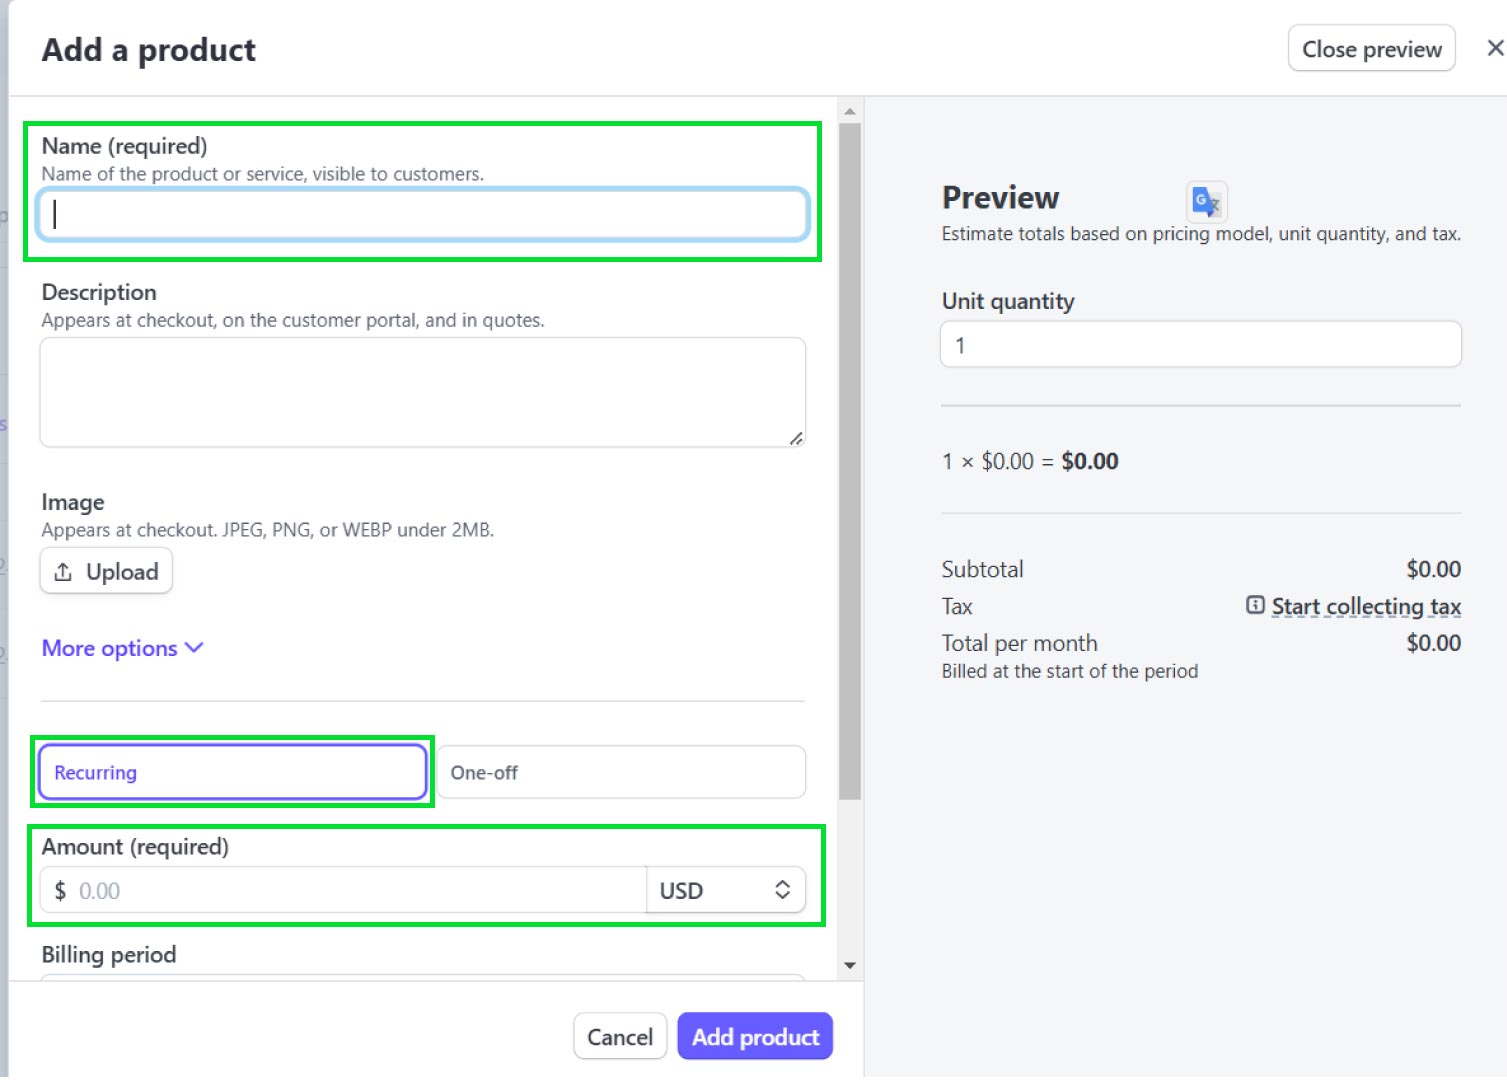
- For Pro product, provide name, description, amount, and select Recurring payment. Billing period should be
Monthly, Unit quantity = 1. Save the product. - Then collect and save the
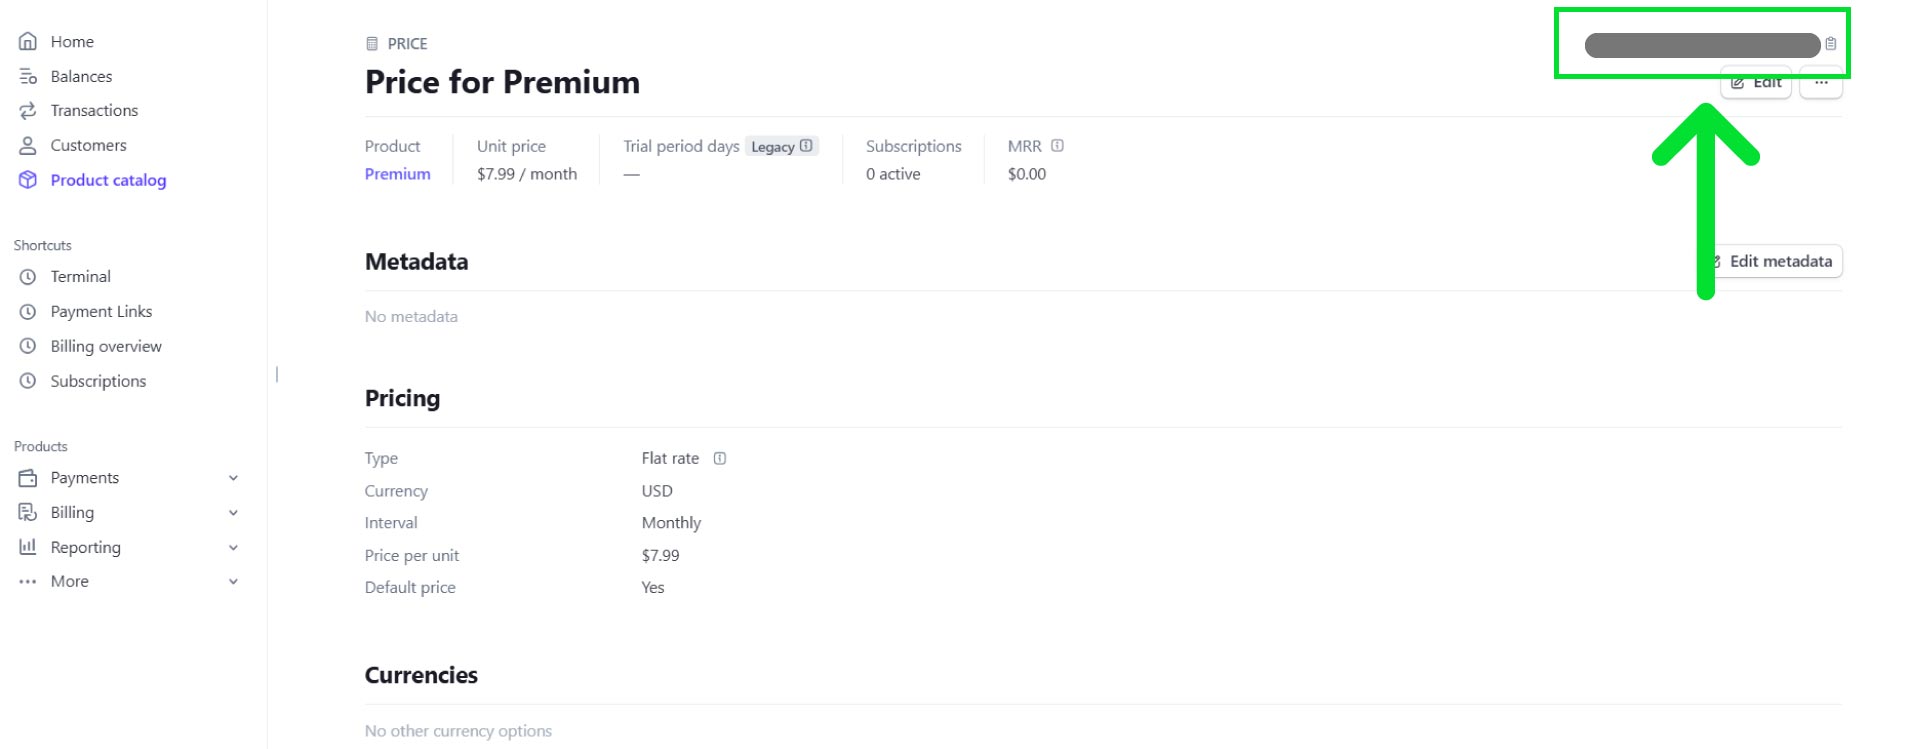
price idof monthly subscription.

- Then go to the same product again and add another price, This time for
Yearlysubscription. Again collect and save theprice idof yearly subscription. - For Premium product, repeat the same process again.
- Then open the backend code in VS code and go to
.envfile, then place yourPrice Idsin their respected fields. - Save the
.envfile.
.env
# Stripe Price IDs
STRIPE_SUBSCRIPTION_PREMIUM_PLAN_YEARLY_PRICE_ID="************************************"
STRIPE_SUBSCRIPTION_PREMIUM_PLAN_MONTHLY_PRICE_ID="************************************"
STRIPE_SUBSCRIPTION_PRO_PLAN_YEARLY_PRICE_ID="************************************"
STRIPE_SUBSCRIPTION_PRO_PLAN_MONTHLY_PRICE_ID="************************************"
Create Stripe Webhook
- From Dashboard's bottom-left corner click on Developers
- Then click on Webhooks tab and then click on Create an event destination.
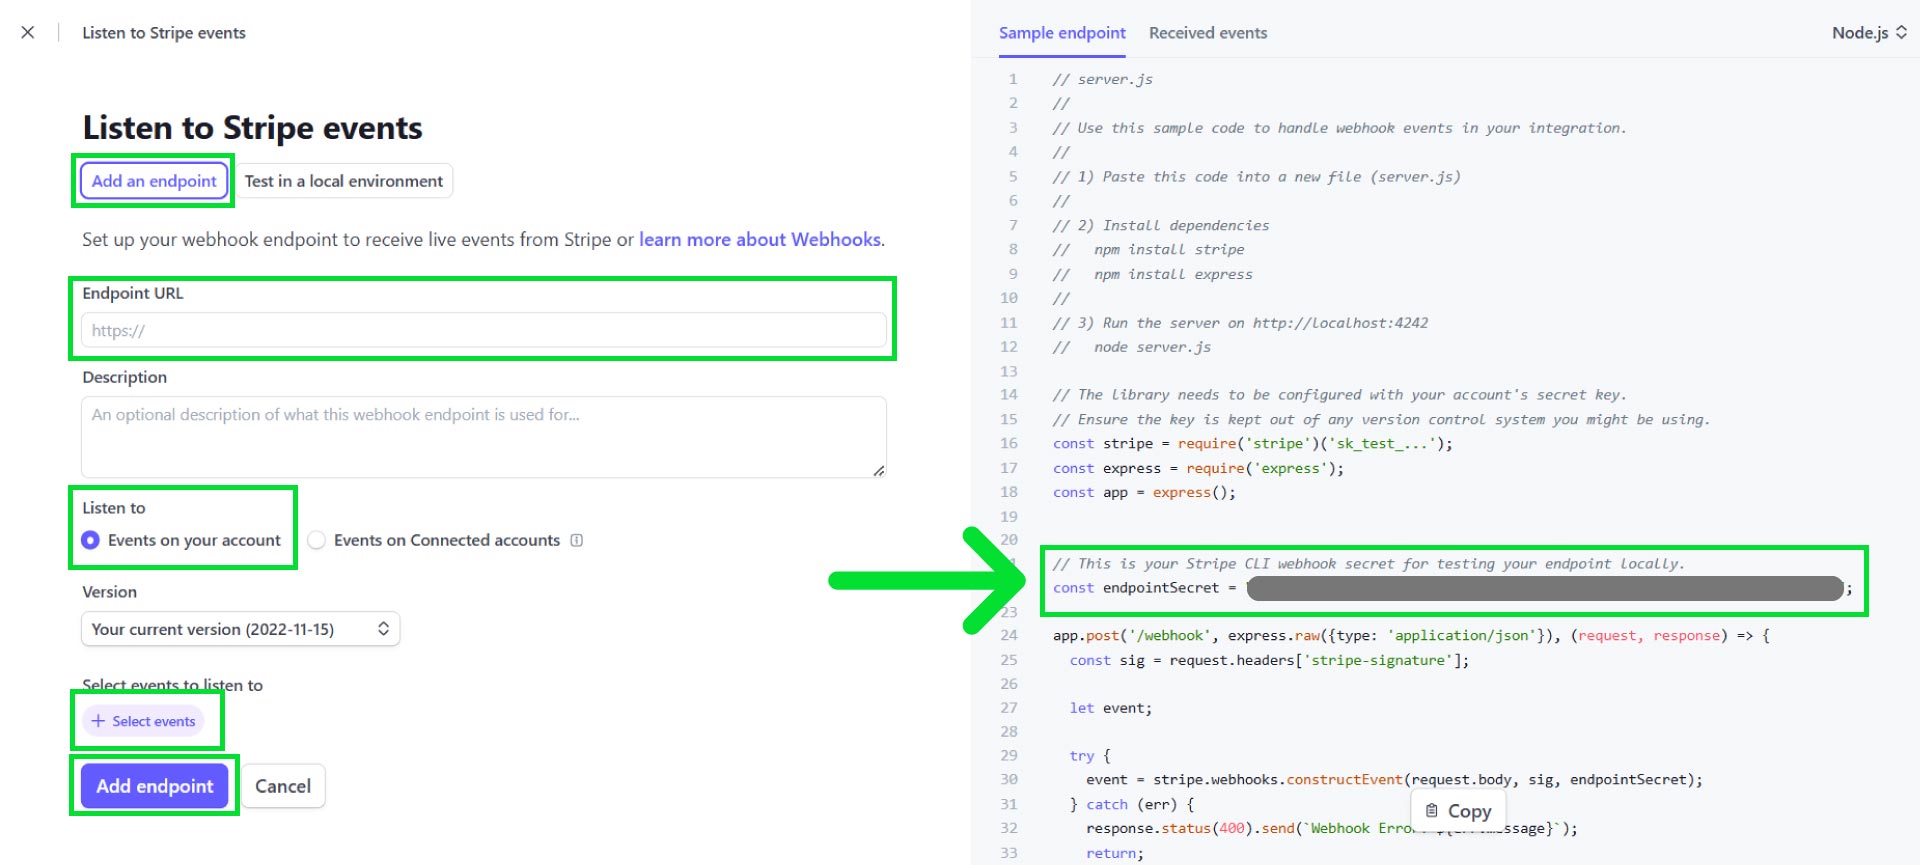
- Then Add an end point

- Your webhook Endpoint URL looks like
https://www.yourdomain.com/api/stripe/server-webhook. Replacewww.yourdomain.comwith your domain name. - Then write description if you want and select Listen to Events on your account.
- Then select all events
- Copy
endpointSecretcode. - Click Add endpoint.
- Now open
.envfile from backend code, and add theendpointSecretvalue toSTRIPE_WEBHOOK_SECRETand save the file.
.env
# Stripe
STRIPE_SECRET_KEY="****************************************************************"
STRIPE_WEBHOOK_SECRET="************************************************"